Ember Resistant Vents: Mesh Retrofit or Full Replacement?
Your attic and crawl space vents are one of the most common ways embers get inside a home. FireRoofs retrofits them with stainless steel Wildfire Defense Mesh, and this guide compares that approach honestly against full replacement vents like Vulcan and BrandGuard.
Ember-resistant vents keep wind-driven embers out of your attic and crawl space. There are two ways to get there. A mesh retrofit covers your existing vent with non-combustible stainless steel ember mesh in the 1/16 to 1/8 inch range, which is the fastest and lowest-cost path when the vent body is sound. Full replacement vents such as Vulcan and BrandGuard swap the whole unit for a listed fire-rated vent, which is the better call when a vent is damaged, has a plastic body, is part of new construction, or when a specific listed vent is required. FireRoofs installs Wildfire Defense Mesh 98 retrofits and does not sell or install Vulcan or BrandGuard vents.
Reviewed by the FireRoofs Team
Bay Area wildfire sprinkler specialists. Built by a FireRoofs Vetted Installer: vetted, licensed and insured, and may differ by job location. Learn more about us
Last updated August 2026
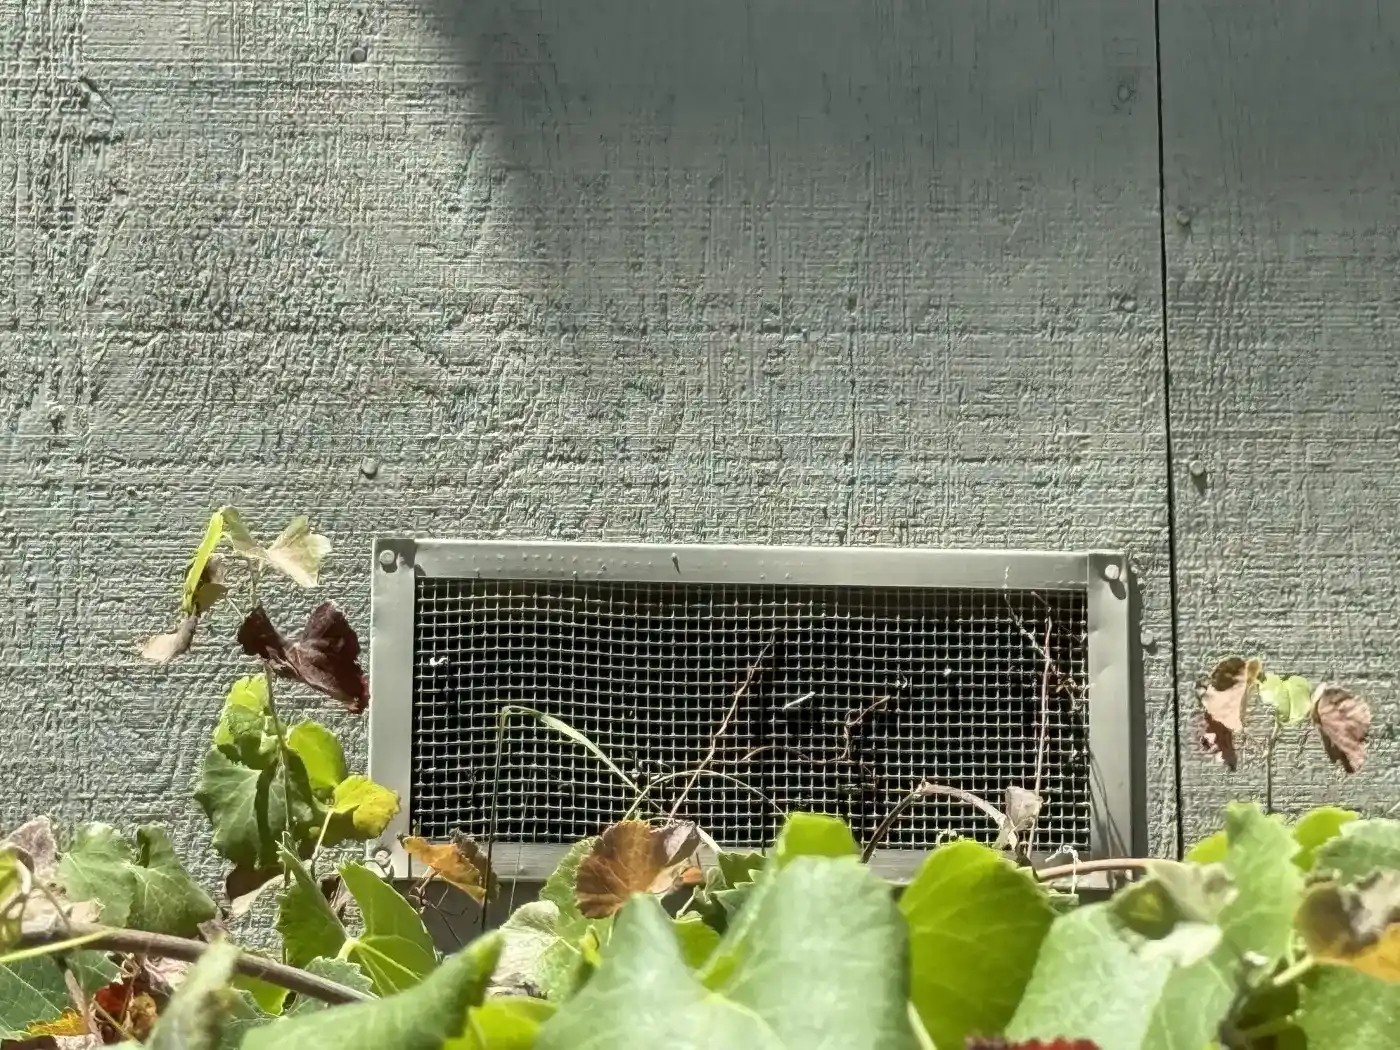
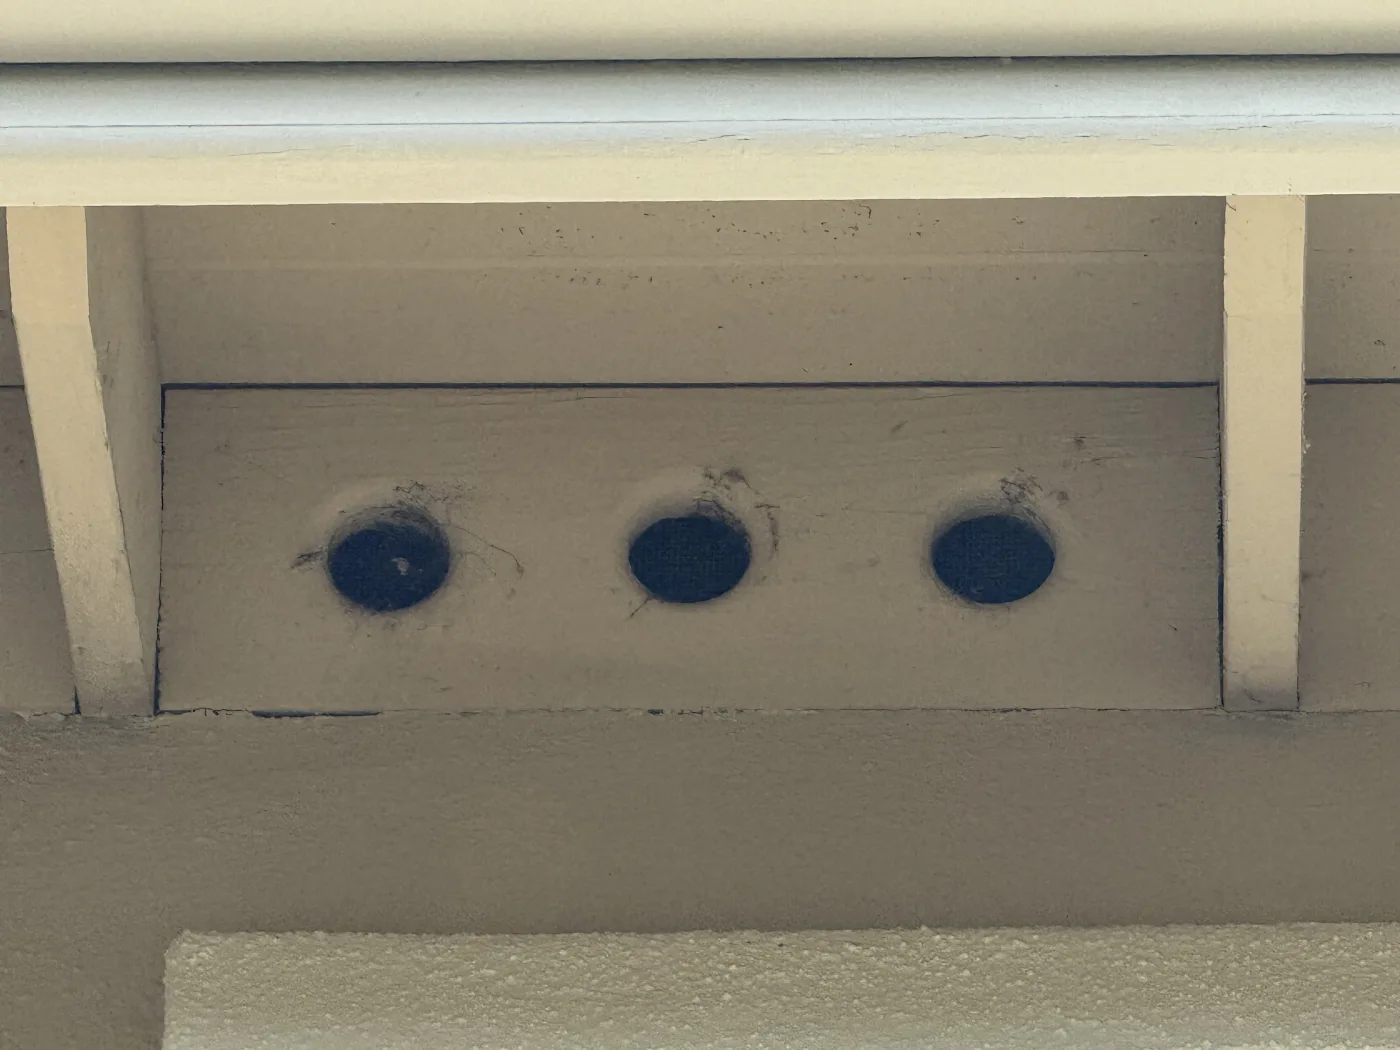
Before: What an Unprotected Vent Looks Like
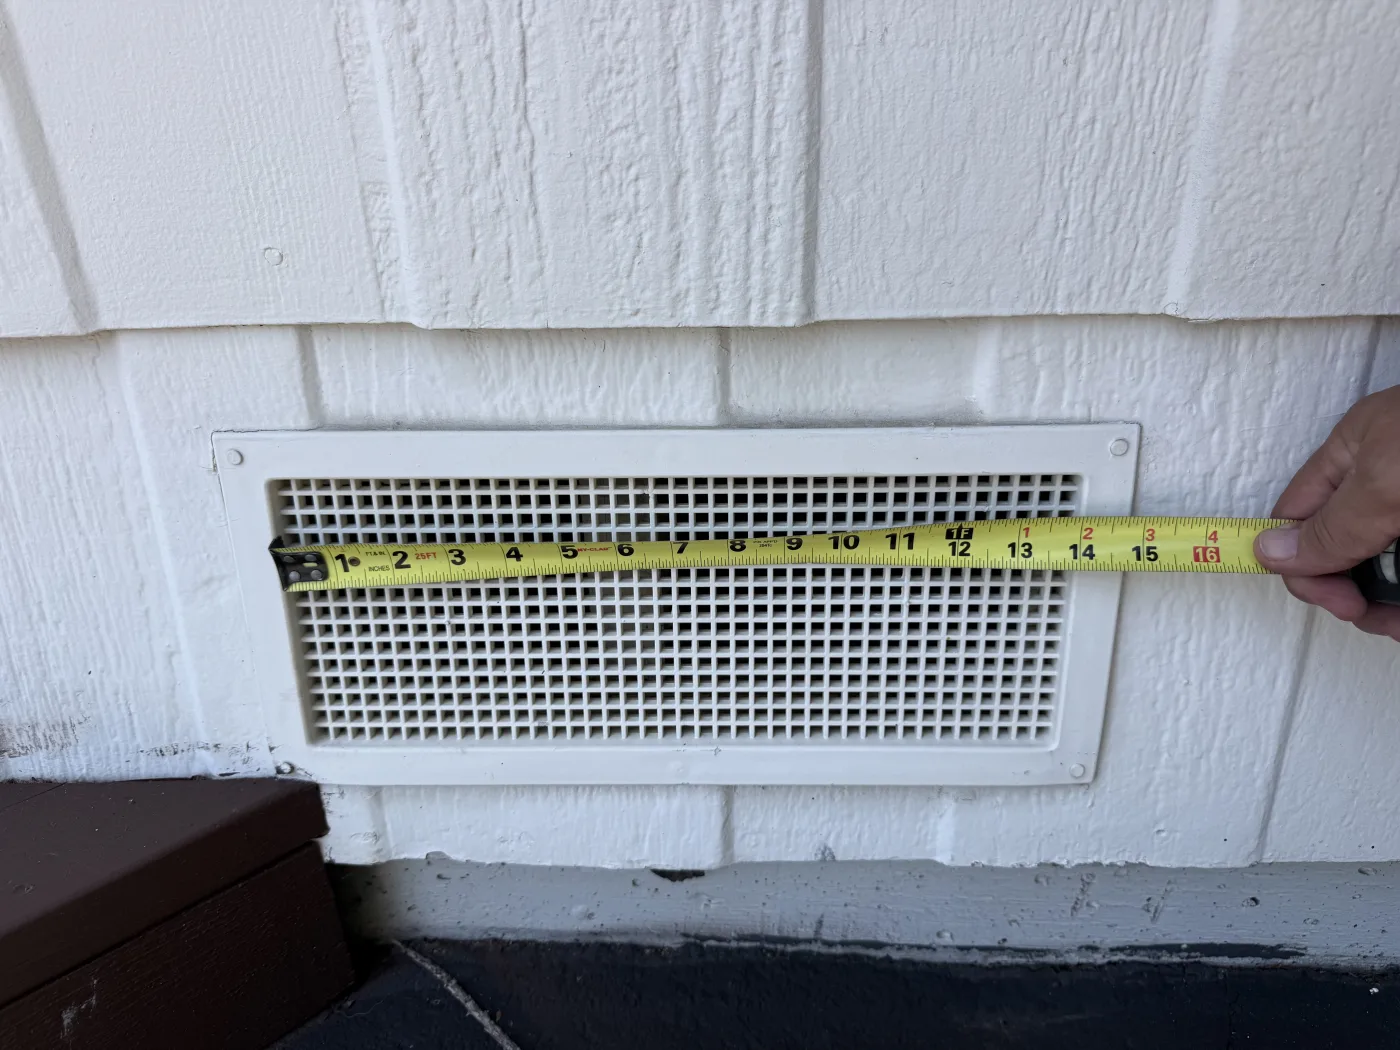
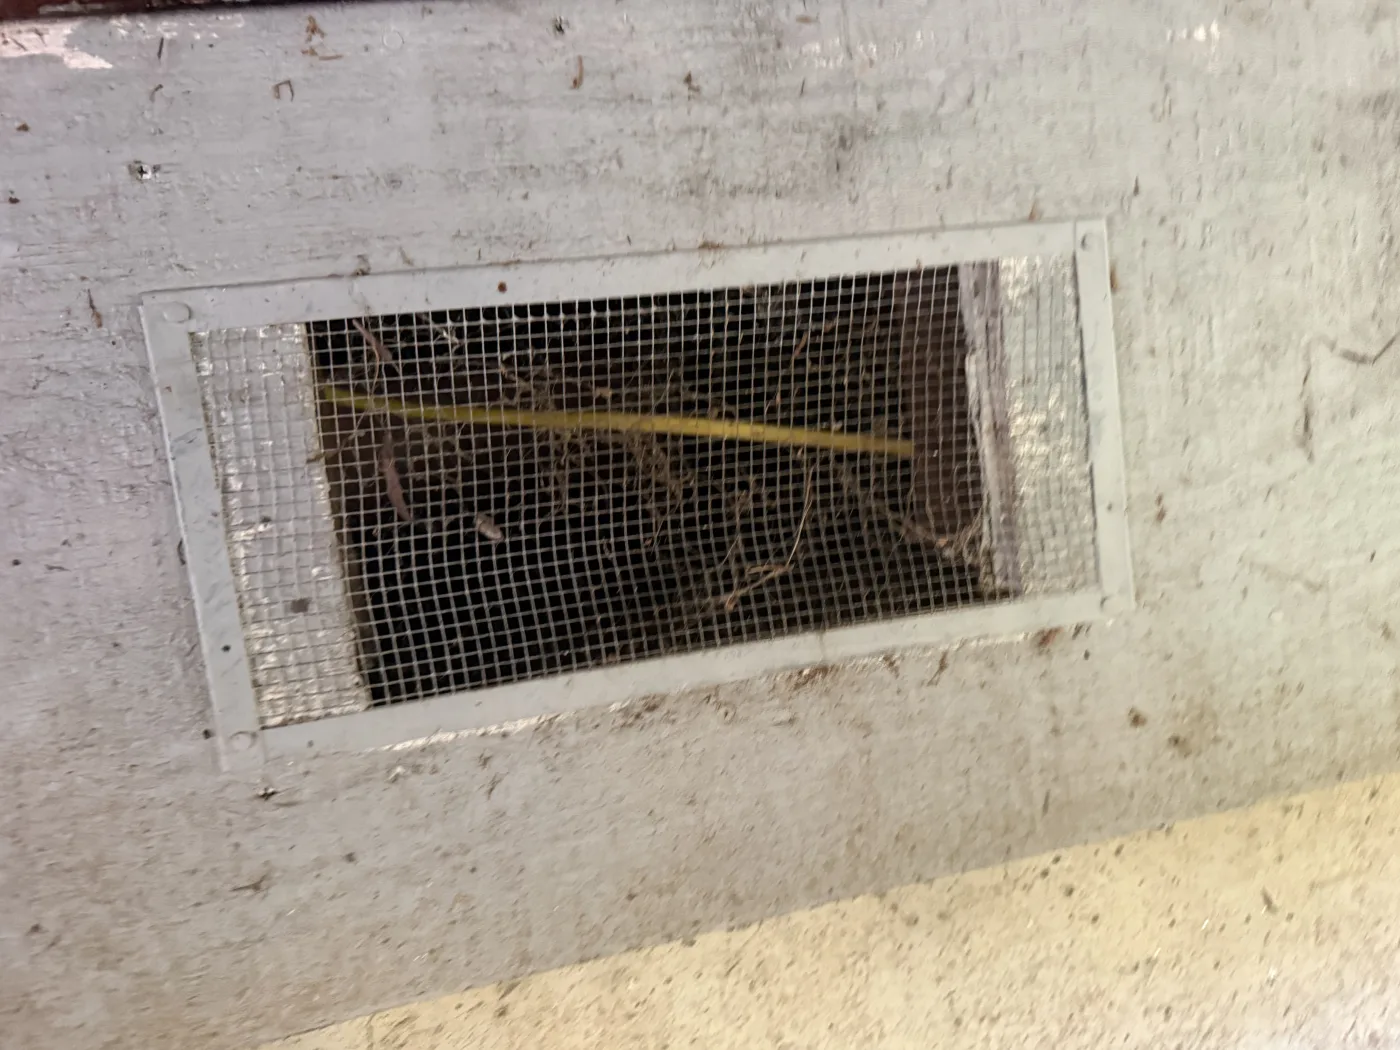
Most existing homes have standard louvered or screened vents with openings around a quarter inch. That is far too coarse to stop wind-driven embers, and it also lets in the leaf litter and debris that a single ember can ignite. These are the kinds of vents we retrofit.
What FireRoofs Installs: The Wildfire Defense Mesh Retrofit
FireRoofs retrofits your existing vents with Wildfire Defense Mesh 98, a 304 stainless steel ember mesh with a 0.0657 inch (about 1/16 inch) aperture. The manufacturer reports it blocks up to 98 percent of embers, is tested to ASTM E2886 when installed vertically, and meets California Building Code Chapter 7A for flame and ember-resistant vents. The manufacturer also states it has been evaluated by UL, IBHS, CSIRO, and QAI. We install it over the vents you already have rather than replacing the whole unit.
The retrofit process
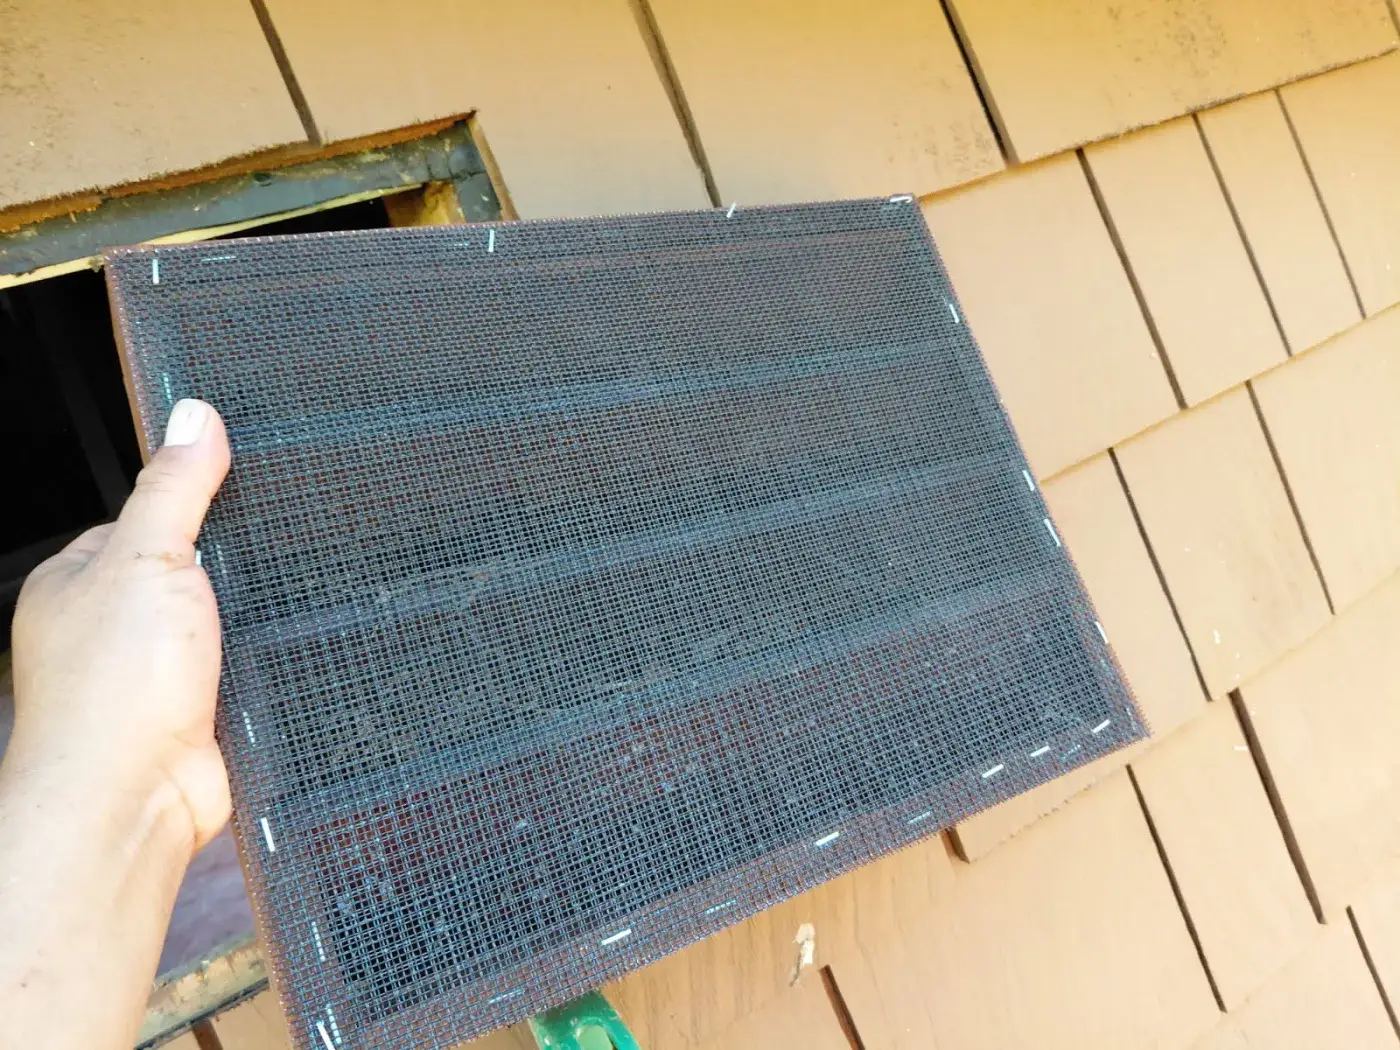
Cut oversize
The mesh is cut larger than the vent opening so it fully overlaps the framing around it, with no gaps at the edges.
Fasten to framing
It is fastened securely to solid framing, not just to the vent louver, so it stays flat and cannot be peeled back by wind or heat.
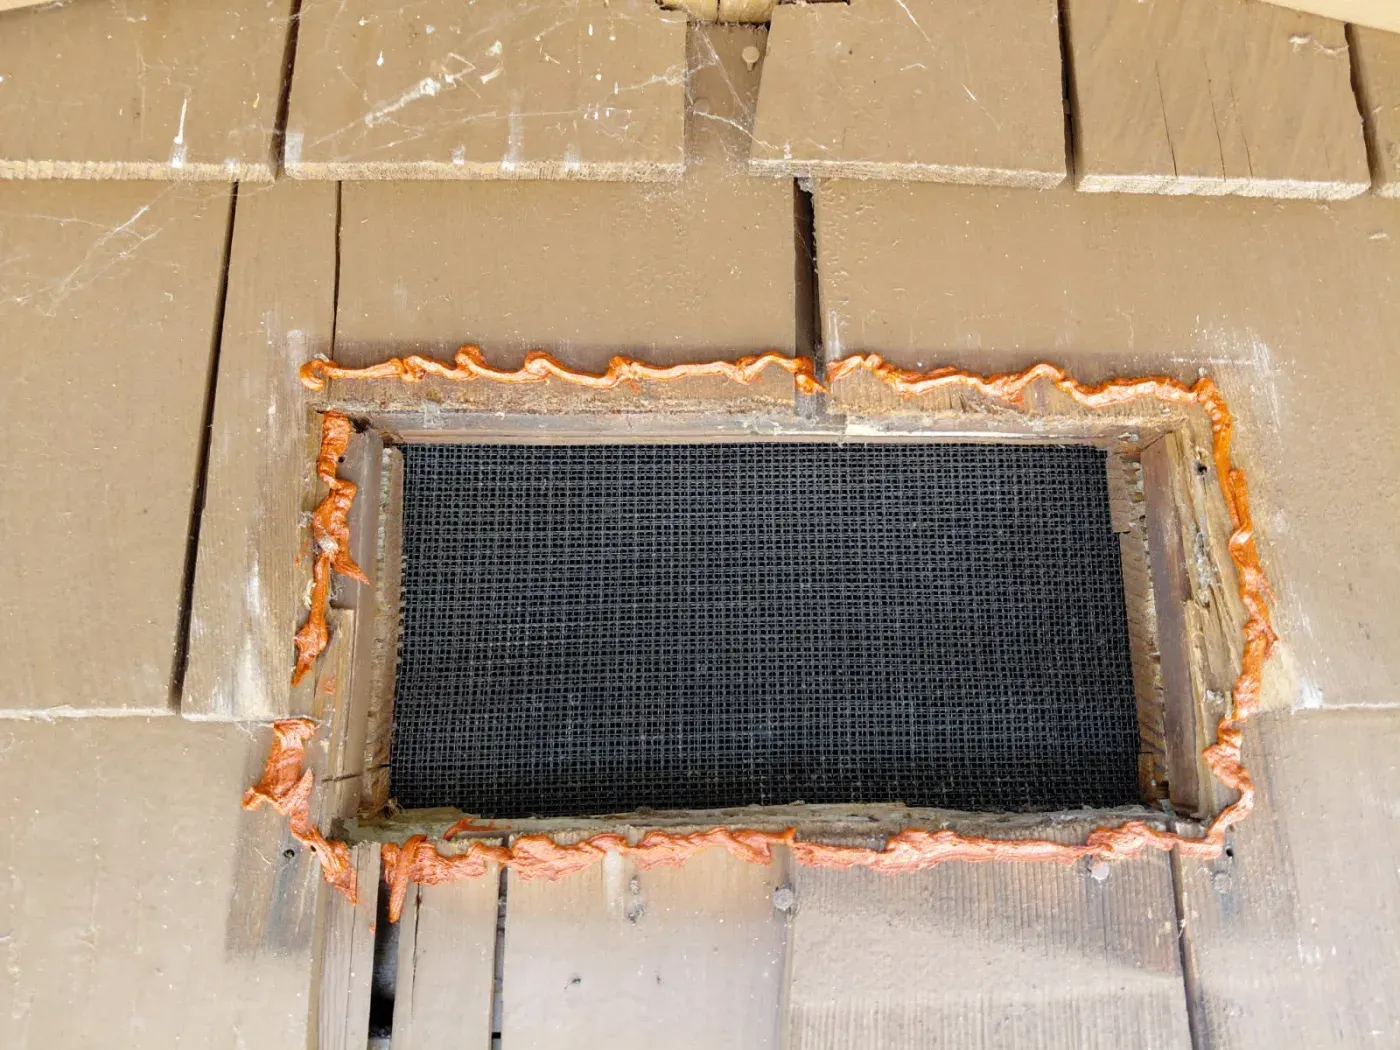
Seal the perimeter
The entire perimeter is sealed with fire-rated caulk so embers cannot slip behind the mesh.
Document each vent
We photograph each vent before and after so you have the specification and proof insurers ask for.
This is the same approach shown in the Home Hardening photos on our homepage. All work is performed by licensed and insured contractors.
Two ways we fit the mesh
Framed covers, painted to match
For soffit and eave vents we build Wildfire Defense Mesh framed covers, primed and painted to match your house color before we arrive, then mounted over the existing vent so it looks clean and intentional.
Interior-side mesh
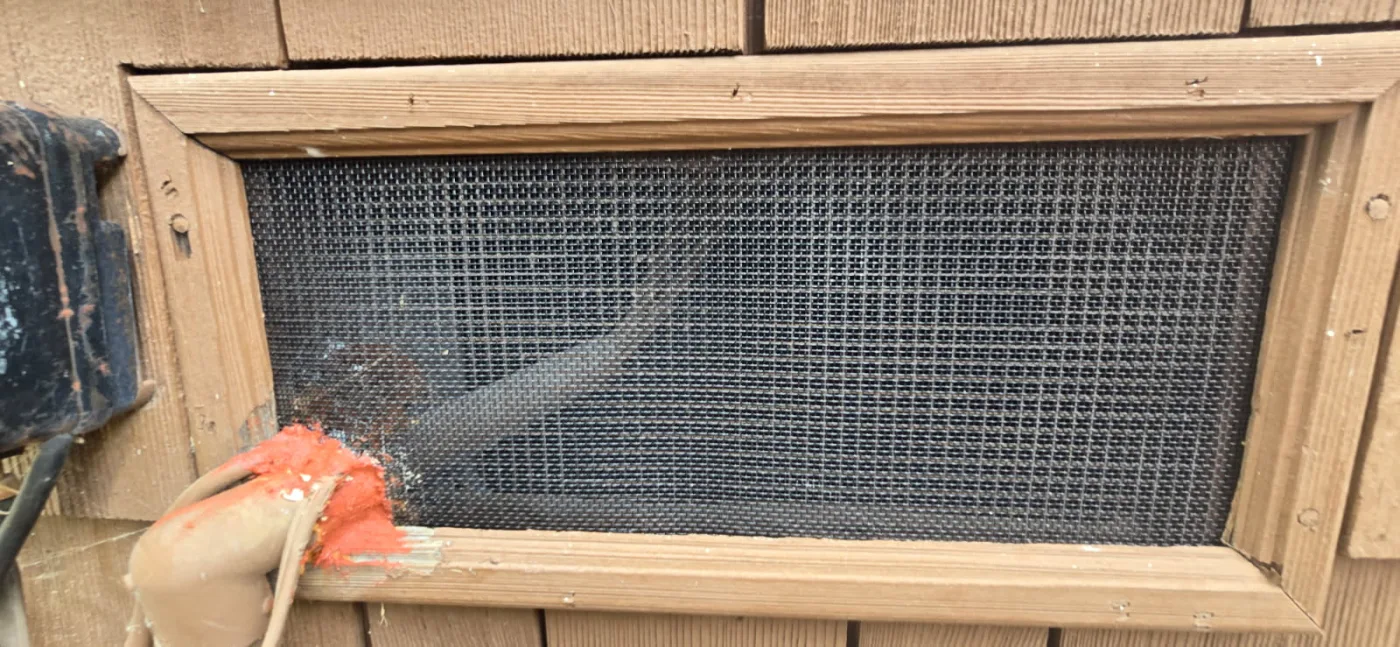
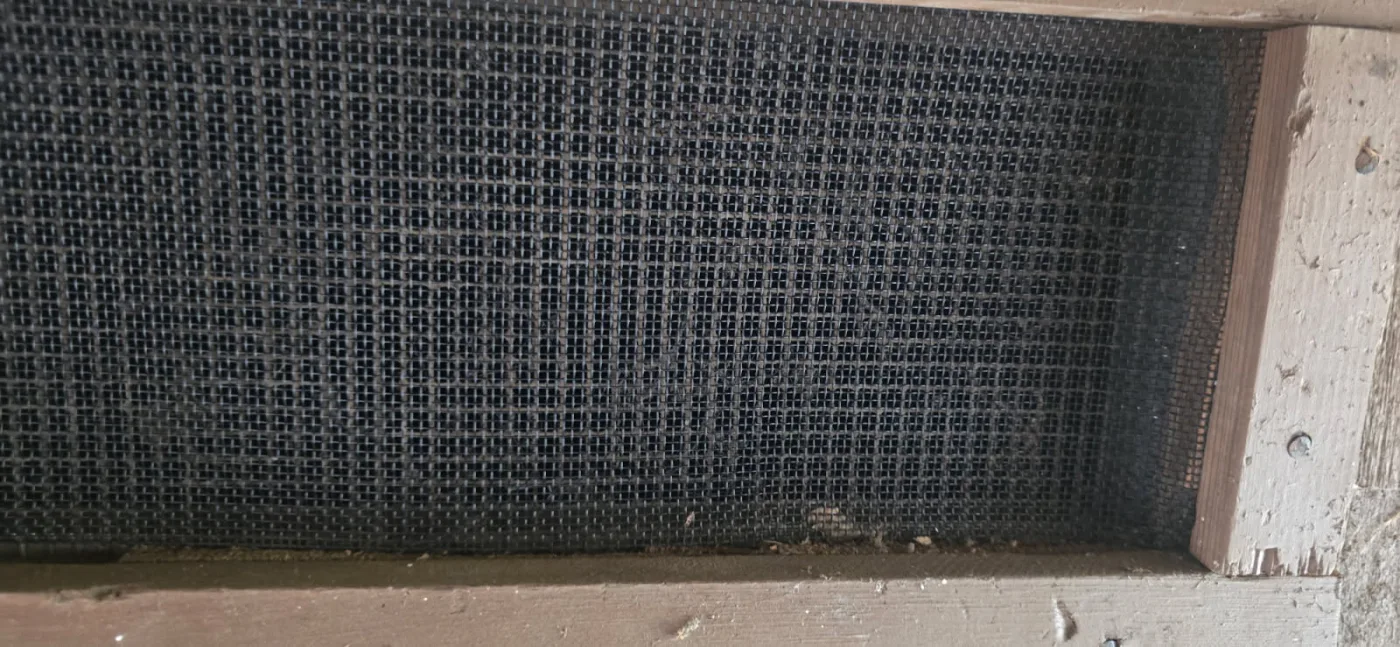
For foundation and crawl space vents we can install the mesh on the interior side, with its factory black powder-coat finish, so the ember barrier is in place without changing the look of the vent from the street.
What It Looks Like On a Real Home
Photos from FireRoofs vent retrofit projects.
Mesh Retrofit vs Vulcan vs BrandGuard
An honest three-way comparison. Competitor details come from each manufacturer's own website.
| WDM 98 Mesh RetrofitWhat FireRoofs installs | Vulcan VentsFull replacement | BrandGuard VentsFull replacement | |
|---|---|---|---|
| What it is | 304 stainless ember mesh installed over your existing vents | New vent built around an aluminum honeycomb core with an intumescent coating | New vent using overlapping baffles with a 1/16 inch stainless mesh |
| How it stops embers | Fine stainless weave (about 1/16 inch) physically blocks embers; the manufacturer reports up to 98 percent ember blocking | Stainless mesh plus a coating the manufacturer says expands near 450 degrees to seal the honeycomb | Baffles strip embers of momentum with a 1/16 inch mesh backstop; the manufacturer notes most models add intumescent strips |
| Airflow | Keeps the existing opening; the finer mesh slightly reduces net free area | Baffle-free design; the manufacturer reports high net free vent area | Baffles reduce airflow somewhat; vents are sized to hold rated net free area |
| When replacement beats a retrofit | Not needed when the vent body is sound | When the vent is damaged, has a plastic body, is part of new construction, or when a specific listed vent is required by code or plan | |
What the FAIR Plan, Regulation 2644.9, Chapter 7A, and IBHS Each Accept
The good news for retrofits is consistency. Each of these programs accepts non-combustible stainless ember mesh in the 1/16 to 1/8 inch range as an ember-resistant vent solution.
California FAIR Plan
Credits ember-resistant vents as a documented mitigation when non-combustible mesh in the 1/16 to 1/8 inch range is used.
CDI Regulation 2644.9
Lists ember-resistant vents among the mitigation measures insurers must recognize for wildfire discounts.
Building Code Chapter 7A
Requires vents to resist embers and flame, generally by ASTM E2886 testing or non-combustible mesh no larger than 1/8 inch and no smaller than 1/16 inch.
IBHS Wildfire Prepared
Calls for vents protected by non-combustible mesh in the 1/16 to 1/8 inch range as part of its home standard.
Confirm the exact requirement and any credit with your local building department and your insurer, since programs are updated periodically.
What Drives the Scope of a Vent Retrofit
Number and type of vents
A typical Bay Area home has 10 to 30 vents. Attic, gable, soffit, foundation, and crawl space vents each need a slightly different approach.
Access
Second-story gables, steep slopes, and tight crawl spaces take more setup than vents you can reach from the ground.
Eaves
Open eaves with blocking vents between the rafters are often best handled together with enclosing the eaves.
Full replacement vents such as Vulcan or BrandGuard take more work per opening, because you are fitting a new listed vent rather than covering the one you already have. That makes sense when a vent is damaged or a listed vent is specified, and is rarely needed when the existing vent body is sound. The fastest way to know your scope is a walk-through: Request a Private Consultation.
We include insurer documentation
On completion we provide documentation you can give your insurer, including before-and-after photos and the product specification for the mesh installed. FireRoofs is not an insurance broker and does not give insurance advice; discount eligibility is determined by your insurer.
The Honest Take on Doing It Yourself
Wildfire Defense Mesh markets do-it-yourself rolls, and the mesh itself is straightforward to cut with tin snips. The mesh is rarely where a retrofit fails. The two things that decide whether it actually works, and whether it counts with your insurer, are the sealing and the documentation.
- Sealing: embers find gaps. If the perimeter is not fully sealed to solid framing with fire-rated caulk, embers slip behind the mesh and the retrofit does little.
- Documentation: mitigation credit depends on before-and-after photos, the product specification, and a clear record of how each vent was covered. Most do-it-yourself jobs never capture this.
What We Never Mesh Over
Some openings must stay clear. Covering them creates a safety hazard, so we never apply ember mesh to:
These carry heat, moisture, or combustion gases that must vent freely. Blocking them can cause backdrafting or fire risk, so they need purpose-built ember-resistant terminations rather than a mesh cover.
Ready to Protect Your Vents?
Two ways to start, depending on where your home is.
Request a private consultation. We will design and install the right sprinkler and hardening system for your home.
Request a Private ConsultationBuilt by a FireRoofs Vetted Installer: vetted, licensed and insured, and may differ by job location.
Get the $149 assessment report. Find out what wildfire risk models flag on your property. Results in minutes.
Get $149 ReportCommon Questions
Is stainless ember mesh enough to stop embers?
For most existing vents, yes. Wind-driven embers are what ignite the majority of homes in a wildfire, and a fine non-combustible stainless steel mesh in the 1/16 to 1/8 inch range physically blocks them from entering the attic or crawl space. The Wildfire Defense Mesh we install is 304 stainless with a 0.0657 inch (about 1/16 inch) aperture, and the manufacturer reports it blocks up to 98 percent of embers. Mesh does not by itself provide a one-hour flame barrier the way a coated or baffled replacement vent can, so where the vent body is damaged or a listed fire-rated vent is specified, full replacement is the better call.
Mesh retrofit vs Vulcan vs BrandGuard: which is better?
They solve the same problem three different ways. A Wildfire Defense Mesh retrofit keeps your existing vent and covers it with stainless ember mesh, which is the fastest and lowest-cost path when the vent body is sound. Vulcan Vents are full replacement units built around an aluminum honeycomb core with an intumescent coating that the manufacturer says expands near 450 degrees to seal the vent. BrandGuard Vents are full replacement units that use overlapping baffles plus a 1/16 inch mesh, and the manufacturer notes most models add intumescent strips. Replacement wins when a vent is damaged, has a plastic body, is part of new construction, or when a specific listed vent is required. For sound existing vents, a mesh retrofit gets you the ember protection at a fraction of the cost and labor.
Does Wildfire Defense Mesh qualify for the FAIR Plan vent discount?
Insurer mitigation programs, including the California FAIR Plan and the discounts required under CDI Regulation 2644.9, credit ember-resistant vents that use non-combustible stainless steel mesh in the 1/16 to 1/8 inch range. Wildfire Defense Mesh 98 sits in that range and the manufacturer states it meets California Building Code Chapter 7A for flame and ember-resistant vents. What actually decides the credit is documentation. You need clear before-and-after photos, the product specification, and a description of how each vent was covered and sealed. That paperwork is where do-it-yourself retrofits most often fall short.
What determines the scope of a vent retrofit?
Scope depends on how many vents the home has and what type they are (attic, gable, soffit, foundation, or crawl space), how high and how easy they are to reach, and whether the eaves are open or enclosed. A typical Bay Area home has 10 to 30 vents. Full replacement vents such as Vulcan or BrandGuard take more work per opening because you are fitting a new listed vent rather than covering the one you have. We confirm scope on a walk-through of the property.
Are ember-resistant vents required in California?
For new construction and many additions in a designated Fire Hazard Severity Zone or Wildland-Urban Interface area, yes. California Building Code Chapter 7A requires vents to resist ember and flame intrusion, generally by testing to ASTM E2886 or by using non-combustible mesh no larger than 1/8 inch and no smaller than 1/16 inch. Existing homes are not always required to upgrade, but doing so is one of the most cost-effective wildfire hardening steps and is credited by insurer mitigation programs. Always confirm the current requirement with your local building department.
Related Home Hardening Guides
Enclosed Eaves
Seal open rafter tails to block embers
Class A Roofing
Fire-rated roof assemblies
Fire-Resistant Siding
Protect your exterior walls
All Home Hardening Products
Complete OSFM-listed materials guide
Fire-Resistant Windows
Multi-pane tempered glass options
Wildfire Assessment Report
Photo-based evaluation of your property
Sources: manufacturer product and testing pages at wildfiredefensemesh.com, vulcanvents.com, and brandguardvents.com; California Building Code Chapter 7A; CDI Regulation 2644.9; and the IBHS Wildfire Prepared Home standard. Manufacturer performance figures are reported by each manufacturer. This guide is for informational purposes. Confirm requirements with your local building department and insurer.